 Lynden
 Building New in Birch Bay: What the Site Actually Throws at a Window
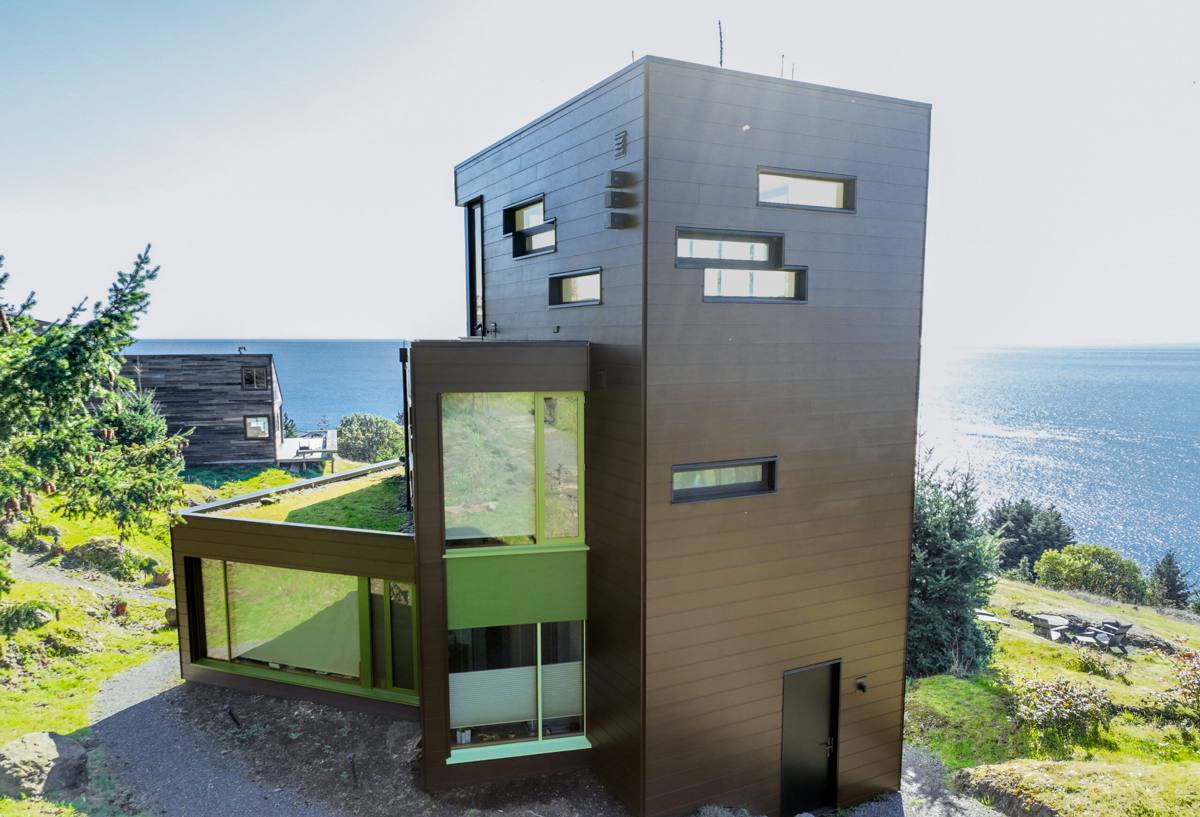
Birch Bay sits right on the water in Whatcom County, and that changes the calculus on a new-construction window job compared to most inland builds. You're closer to salt spray carried in off the bay, you get more direct wind-driven rain than a sheltered lot a few miles inland, and the mild, damp Pacific Northwest climate keeps everything shaded or north-facing wet for long stretches of the year. That combination is exactly why moss, algae, and slow rot show up faster on Birch Bay homes than on comparable houses further from the water. A window isn't just glass and a frame sitting in a hole in the wall — it's a penetration through your weather barrier, and on a shoreline lot that penetration has to be detailed correctly the first time, because there's no siding or paint finish to hide behind once the house is closed in.
Lynden Siding builds and installs new-construction windows for homes going up in Birch Bay and across Whatcom County, and we do it as part of the same crew that handles the siding, flashing, and weather barrier around those openings. That matters here specifically because a window installed correctly but flashed incorrectly into the wall assembly will still leak, and a window flashed correctly but installed with the wrong shims or fasteners will still fail early. New construction is the one point in a home's life where you get to do both right, at the same time, before anything is buried behind finish materials.
Why New Construction Is a Different Job Than a Retrofit
Replacement window work happens inside an existing wall, usually reusing the old opening and working around finished siding and interior trim. New-construction window installation happens before any of that exists — the rough openings are framed, the weather-resistive barrier (WRB) is going up or already on, and the window itself has a nailing fin or flange designed to be integrated directly into that barrier in a specific shingle-lap sequence. That sequence is not optional. It's the entire reason new-construction windows perform better long-term than retrofit units in a coastal environment: water that gets past the exterior cladding has a continuous, layered path down and out, rather than a seam that depends on caulk alone.
On a Birch Bay lot, we treat that sequencing as non-negotiable. Sill pan flashing goes in first, sloped to drain outward. The window's nailing fin gets integrated into the WRB using a proper shingle-lap order — sill, then jambs, then head — so every layer sheds water onto the layer below it, never up into a seam. Head flashing goes on last, lapped over the housewrap above the window. None of this is unusual practice, but it's easy to rush or skip steps on a job site under schedule pressure, and skipping any one of them is how a brand-new house ends up with a hidden leak by year three.
What Correct Installation Involves, Step by Step
- Verify rough opening size, plumb, level, and square before the window ever arrives on site.
- Install a sloped sill pan flashing membrane, extending past the rough opening on both sides.
- Set the window on shims at the correct load points, never resting weight on the nailing fin alone.
- Fasten per the manufacturer's schedule — spacing and fastener type both affect the warranty.
- Integrate the nailing fin into the WRB in proper shingle-lap order: sill, jambs, then head.
- Seal and flash the head last, lapping housewrap over the top flange.
- Insulate the gap between frame and framing with low-expansion foam or backer rod, never packed fiberglass alone.
- Apply interior and exterior sealant beads at the correct locations — not everywhere, since some assemblies need a drainage gap.
Choosing Frame Material and Glass for a Shoreline Build
Birch Bay's salt air and near-constant humidity narrow the field of window products that make sense here versus what might be fine on a dry, inland lot. We walk every new-construction client through frame material, glass package, and hardware finish with that environment specifically in mind, since a window spec'd for a sheltered site inland can underperform fast this close to the water.
| Frame Material | How It Handles Salt Air & Moisture | Maintenance | Typical Fit |
|---|---|---|---|
| Vinyl | Won't corrode or rot; performs well near salt air | Low — occasional cleaning | Most Birch Bay new builds; strong value |
| Fiberglass | Excellent stability, resists warping in temperature swings and moisture | Low | Higher-end builds, larger openings |
| Wood-clad | Exterior cladding protects the wood, but any breach exposes it to rot risk in this climate | Higher — finish and seals need monitoring | Homeowners who want a wood interior look and are willing to maintain it |
| Aluminum | Conducts cold and can corrode with prolonged salt exposure unless marine-grade | Moderate | We use this selectively, mainly for large commercial-style openings |
For glass, we generally spec dual-pane, low-E coated units with argon fill as the baseline for new construction in this area — that combination cuts condensation risk and keeps heating costs down through a wet Whatcom County winter. On more exposed elevations facing the bay, we'll talk through upgraded spacer systems and impact-resistant options, since driving rain on an exposed wall pushes harder on seals than the same window would see on a sheltered side of the house.
Our Process From Rough Opening to Final Trim
New-construction window work has to move in step with the framer, the siding crew, and often the general contractor's schedule, so we coordinate timing rather than showing up whenever it's convenient for us alone.
1. Plan Review and Product Selection
Before anything is ordered, we review the plan set for opening sizes, egress requirements, and any energy code specifics that apply in Whatcom County. We talk through frame material, glass package, and grille or hardware style with the homeowner or builder at this stage, since window lead times mean changes later can hold up the whole framing schedule.
2. Rough Opening Verification
We check every opening against the ordered window sizes before installation day. Framing tolerances vary, and catching a problem here costs an hour; catching it after the window arrives costs a week.
3. Flashing and Installation
This is the step described above — sill pan, shims, fastening, shingle-lap WRB integration, head flashing. We do this the same way whether the house is a stone's throw from the water or set back further, because the sequence is what prevents failure, not the distance from the bay alone.
4. Weather-Tightness Check
Before siding closes in around the windows, we do a visual pass on every opening — flashing laps, fastener seating, gaps, and sealant placement — because this is the last point where a mistake is cheap to fix.
5. Interior and Exterior Trim
Once siding is on, we return for exterior trim work and coordinate with interior finish crews so casing and sill work happens cleanly around a window that's already sealed and performing correctly.
Moss Season and What It Means for Window Longevity
Whatcom County's moss season runs long — mild, wet weather for much of the year gives moss, algae, and mildew plenty of time to establish on any surface that stays damp or shaded. Windows themselves don't grow moss, but the sills, trim, and the top of head flashing are exactly the kind of horizontal or semi-horizontal surfaces where organic growth and standing moisture take hold if drainage isn't built in correctly. A sill pan flashing that isn't sloped, or a head flashing that traps water instead of shedding it, will show the effects within a couple of seasons on a Birch Bay lot — usually as staining, soft trim, or a slow leak that shows up on an interior wall long after the exterior looks fine. Getting the drainage geometry right during new construction is the cheapest possible insurance against that; it costs nothing extra to slope a sill pan correctly, but it can cost a great deal to fix a rotted opening years later.
Common Mistakes We See on Coastal New Builds
- Skipping or reversing the shingle-lap order — WRB integrated over the nailing fin instead of under it at the sill, which funnels water into the wall instead of out.
- Caulk used as the only water management strategy — sealant fails over time; flashing shouldn't depend on it as the first line of defense.
- Packing the shim gap with fiberglass insulation — it holds moisture against the frame instead of letting it drain.
- Fastening through the frame instead of the nailing fin — can distort the sash and void manufacturer warranties.
- No sill pan flashing at all — still common on fast-tracked builds, and one of the single biggest causes of early window-related rot.
- Wrong glass package for the exposure — a window spec'd for a sheltered elevation installed on a bay-facing wall with no adjustment for wind-driven rain.
Why Hiring a Crew That Already Works Birch Bay Matters
Anyone can install a window into a framed opening. Fewer contractors have actually built enough homes on Whatcom County's shoreline to know how differently that opening needs to be detailed depending on exposure, wall orientation, and how close the lot sits to the water. We work Birch Bay regularly enough to know which elevations take the harder rain, how local building department inspections tend to look at flashing details, and how the marine layer here behaves differently than it does even a few miles inland in Lynden. That's not a marketing point — it's the difference between a window that gets installed once and performs for decades, and one that looks fine at final walkthrough but starts causing problems once the house has weathered a couple of real Pacific Northwest winters.
We also stay involved past the window install itself, since we do siding and exterior work on the same homes. That means the flashing details around your windows are coordinated with the siding plan from day one, instead of two separate trades handing off a wall assembly with mismatched expectations about who's responsible for what layer.
Cost Factors on a New-Construction Window Package
Every new build is different, and we won't quote a number without seeing your plans, but the following factors are what actually move the price on a Birch Bay new-construction window package.
| Factor | Why It Matters |
|---|---|
| Number and size of openings | Larger and more numerous units mean more material and more flashing labor |
| Frame material | Vinyl is typically the most cost-effective; fiberglass and wood-clad cost more upfront |
| Glass package | Upgraded low-E coatings, argon fill, or impact-resistant glass add cost but pay off on exposed elevations |
| Exposure and elevation | Bay-facing walls may warrant upgraded flashing details or hardware beyond baseline code minimums |
| Access and site logistics | Staging, scaffolding, or crane needs on taller or tighter Birch Bay lots |
| Coordination with other trades | Scheduling around framing and siding crews can affect labor efficiency |
A Simple Checklist Before You Order Windows for a Birch Bay Build
- Confirm egress requirements for bedrooms are met on the plan set, not just assumed.
- Match frame material to actual exposure — don't default to whatever's cheapest without considering the bay-facing walls.
- Ask your installer how they handle sill pan flashing and shingle-lap sequencing, specifically.
- Build window lead times into your framing schedule; coastal-rated units can take longer to arrive than standard stock.
- Plan siding and window installation with the same crew or with clear coordination between the two.
- Get a weather-tightness check before siding closes in around the openings, while flashing is still visible and fixable.
If you're planning a new build in Birch Bay and want windows installed by a crew that treats flashing and weather barrier integration as seriously as the window itself, we're glad to walk your plans and give you a straightforward, no-pressure estimate. Use the form below to get in touch.
```